Step 1: Gathering the Items
Download 3D Files: HERE
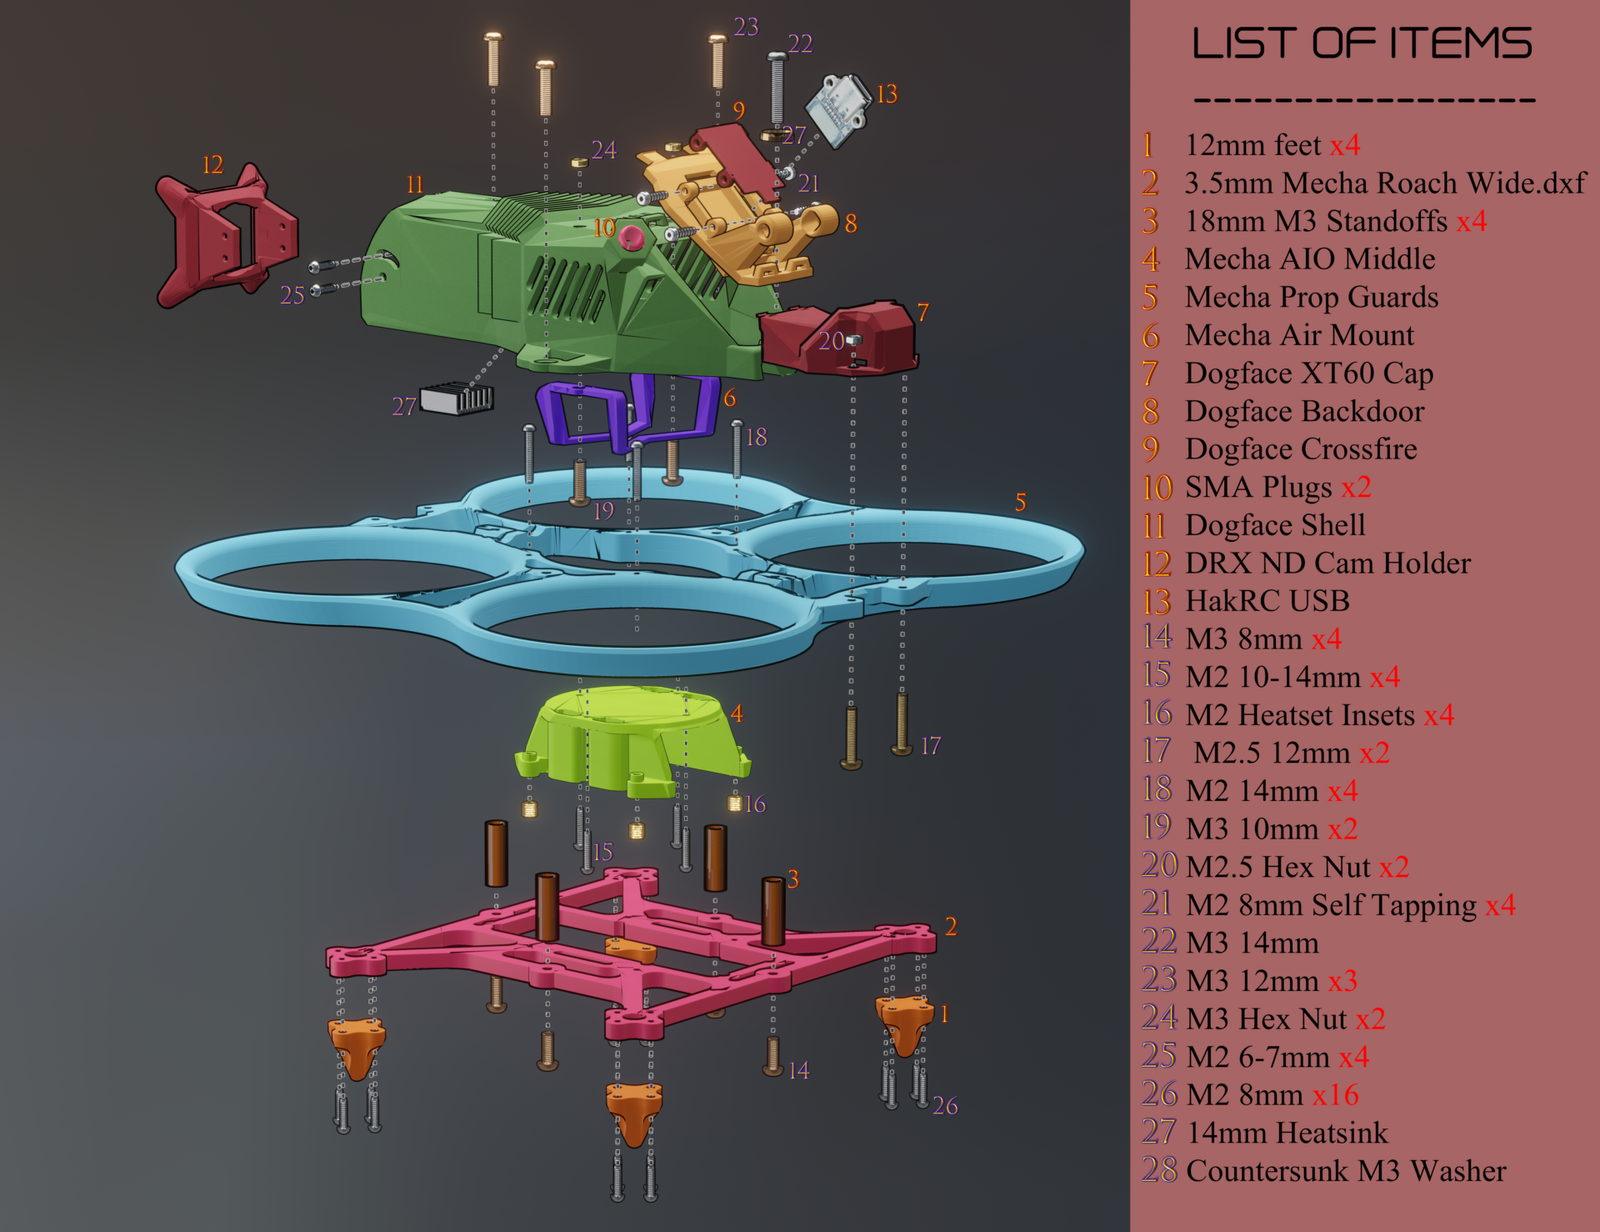
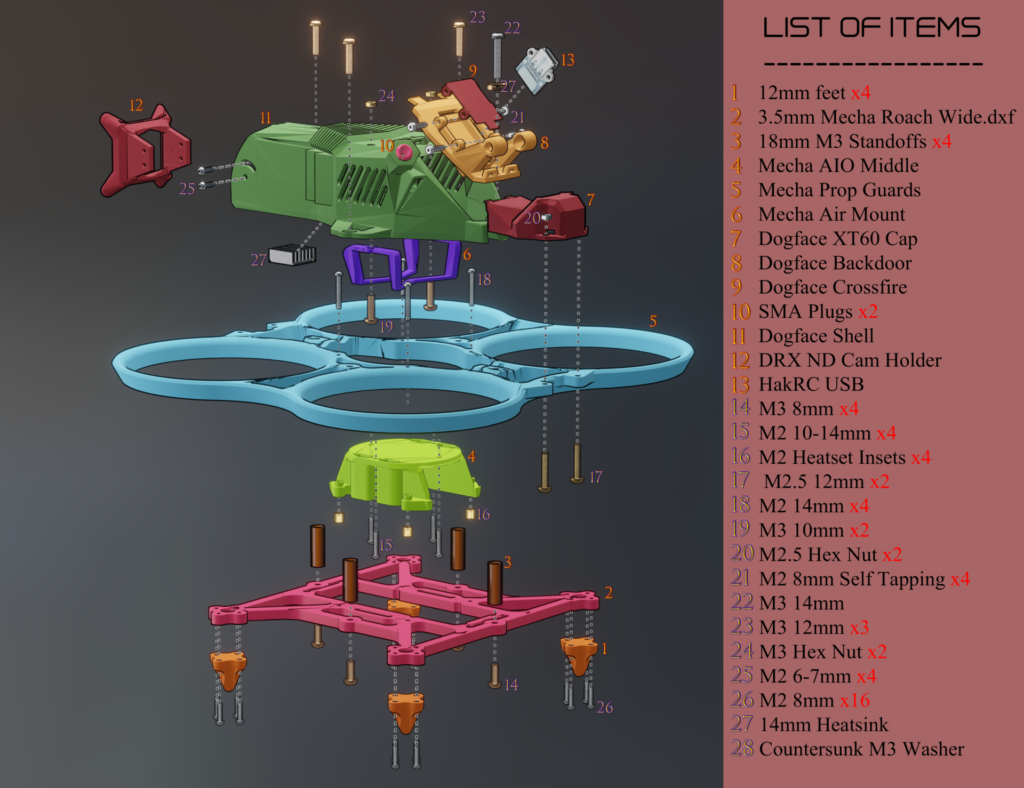
The first thing you must do is go to HERE to download the 3d files needed for the build. You will then need to get all the screws and bits n bobs used in the build. here is a list and links where I could find them:
You will need some polymaker polyMax PLA: HERE
Screws: LINK to amazon’s pretty good screw filter results
- M2 8mm x16
- M3 8mm x4
- M2 10-14mm x4
- M2 Heatset Inserts x4 LINK
- M2.5 12mm x2
- M2 14mm x4
- M3 10mm x2
- M2.5 Hex Nut x2 LINK
- M2 8mm Self Tapping x4 LINK
- M3 14mm x1
- M3 12mm x3
- M3 Hex Nut x2 LINK
- M2 6-7mm x4
- M3 Countersunk Washer LINK
Other:
- XT60E-M
- Heatsink
- Thermal Pad
- USB – THIS is an alternative you can buy easily, though it might take some gluing to get it to work. However, I talked to HakRC and they said if you send them an email over at hakrc.com, they are willing to ship the fantastic USB breakaways they make in small batches.
- USB To AirO3
- ND Filter Set used in DRX ND system
- Carbon Fibre Cutting service
- Heat Shrink
- HakRC 40a AIO
- Foxeer Lolipop 4
- DJIO3
- Brotherhobby 1504.5 3950KV
- DRX ND System
- Diatone Battery Strap
- Fastening Tape
- Forceps HERE and HERE
- E7000 Glue
- Metal Ring For battery Strap
- GUMMY GRIP PAD
Step 2: The Build
Follow this VIDEO GUIDE and below are some supplementary pictures to help


STEP 3: Betaflight
Here is a LINK to a google drive with the CLI for BF 4.4 for the mecharoach, you may been to change some things depending on your receiver protocol, build, and preferences. NOTE this only works for hakrc 40a aio and bf 4.4
also just in case BetaFlight is on another version or you are using another aio. Here are some PICTURES of the tune to get you started
STEP 4: Give Back
All I ask in return is that you do one of two things, preferably both.
1) Sub to the Patreon
2) If you successfully built the drone, go out there and help someone else build it as well. Share the love